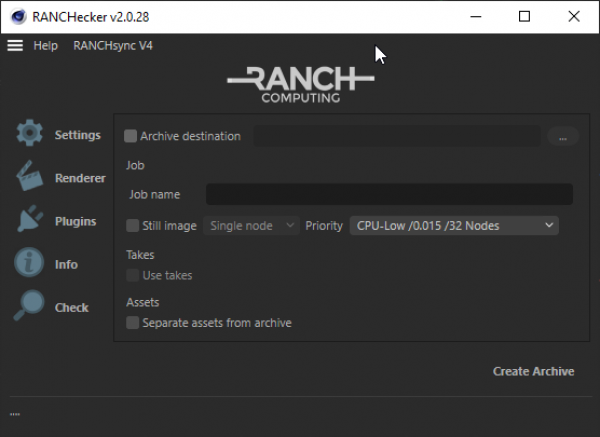
RANCHecker is a Cinema 4D plugin developed by the RANCH to help you prepare your project before uploading it to the RANCH.
Installation
1. Download RANCHecker for Cinema4D 2. Extract the contents of the archive into CINEMA 4D R… > plugins (or please create the folder if it does not exist yet) 3. Open Cinema 4D
Interface integration
We recommend to create a button in a palette as a way to launch RANCHecker quickly.
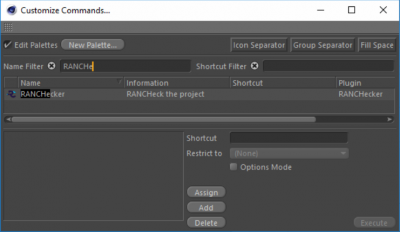
1. Go to Menu Window > Customization > Customization Palettes… 2. In the Name Filter field, type RANCHecker
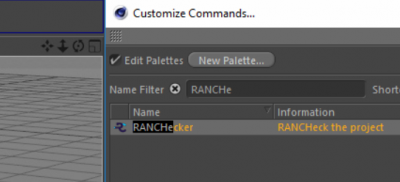
3. Drag and drop the RANCHecker command to the choosen palette.
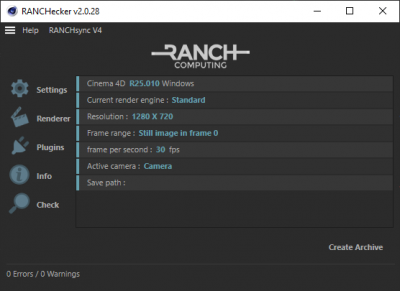
First step with the RANCHecker
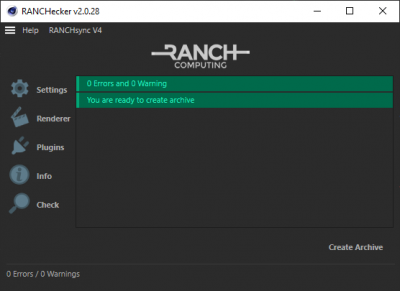
1. Information panel
General information to check before preparing the archive.
2. Quick control panel
Quick scene verification without creating an archive file. It is recommended to do a quick check before clicking “Create Archive”.